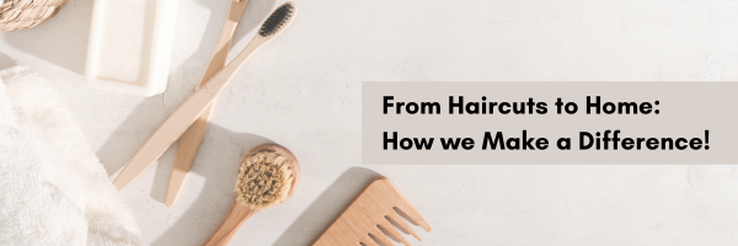
The Cat's Meow Salon
  • Home
    • Re-opening Protocols
    • The Hair Apparent Blog
  • About Us
    • Links to My Life
    • New York Fashion Week
    • Testimonials
    • Community Involvement
    • Contact Us
    • Photo Gallery >
      • Boudoir
      • Pin-up
      • Beauty
  • Services
    • Weddings
    • Salon Services >
      • Make-up
      • Hair Cutting and Styling >
        • Curl Specialist
      • Hair Coloring >
        • Blonding and Balayage
      • Deep Conditioning Treatments
      • Thinning Hair Treatments
  • Gifts
  • Environmental Initiatives

Discover Your Skin's New BFF's This Winter!

1/25/2021

0 Comments

 
Picture
Erase dry, thirsty
​ skin with my
Winter Skin
Survival Guide!
Let's Face it...harsh Canadian Winters can be tough on your skin! My Winter Skin Survival Guide offers 4 easy steps to bring dull, dry skin back to life with my favourite line up of Monat anti-aging skincare products that are completely non-toxic and plant-based.
CLEANSERS
STEP 1
Ensure your thirsty skin is all ready to receive the ultimate moisture and hydration it's craves with a cleanser made specifically for your skin type. Be Balanced Foamy Cleanser is for normal to oily skin and Be Gentle Creamy Cleanser is for normal to dry skin. They offer the ideal first step in helping to restore your skin's natural glow and give it the hydrating boost it needs. 
Picture
Picture
ESSENCE
​STEP 2
Smooth, soften and hydrate your dry, dull skin with Monat's Skin Revitalizing Essence. If you're anything like me, your poor face is feeling like harsh effects of a rough winter (it's been rough for all kinds of reasons)! Pressing this essence into your skin is like giving it a cool drink of water! It feels so refreshing and has an amazing uplifting aroma. 
SERUMS
STEP 3 
Immerse your skin with powerful plant-based ingredients to kiss the signs of aging goodbye. Use silky C. Radiance Illuminating Serum in the morning for a supercharged dose of potent antioxidants that help brighten and enhance your complexion. At night, apply Rewind Age Control Nectar to tackle uneven skin tone, age spots, loss of elasticity, fine lines and wrinkle. Finish with lightweight Plant Bakuchiol Vegan Retinol Alternative Lotion to flood your skin with botanical actives that replenish your skin while you sleep. You won't believe the power of plants!
Picture
Picture
MOISTURIZERS
STEP 4
Each morning, restore comfort and radiance to compromised, dehydrated winter skin with Be Balanced Lightweight Moisturizer or Be Gentle Nourishing Moisturizer. At night, apply Night Haven Overnight Age Control Cream to lock moisture in as you sleep.
It's like magic! 


Determining the right  skin care products depends largely on your skin type and condition, such as oily, dry or a combination of both. I am happy to consult with you about the best one for your skin care needs and how to incorporate a good skin care ritual into your daily routine! It's one investment that really shows!

And when your skin looks this good, you don't need  much make-up. #nofilter
Picture
shop now
0 Comments

How to make small eyes look BIGGER

1/7/2020

1 Comment

 
We all would like to look a little more AWAKE wouldn't we?! All eyes are beautiful but if you have small hooded eyes like me that are sometimes puffy, then learning a few tricks to make them appear larger (and make it look like I got a full nights' sleep) could really come in handy! Using clever makeup techniques and good skincare products can help create the illusion of larger eyes. 
Picture
1. DON'T FORGET ABOUT YOUR EYEBROWS
Eyebrows can make a huge difference! Fuller, darker brows are more on trend right now because they appear more youthful, but fuller brows also help to frame your face. Often as we age, our brows tend to thin and disappear, especially on the ends and especially in photographs. When doing make-up for photoshoots, the brows are an essential part of doing the total eye look. Regular waxing appointments can give your face a little makeover in just a few minutes! Tidying up the stray hairs that visually drag the eye down can go a long way to lift the eye up and create a nice clean base for applying makeup. 

PRO -TIP:  To get fuller brows, use a soft shadow or liner, a few shades lighter than your hair to fill them in without looking scary. 

2. SAY GOODBYE TO PUFFY EYES
Picture
The secret to bright eyes is treating them right, every single day. The swollen skin around your eyes can make them look even smaller. But the good news is, there are some simple ways to reduce the puffiness.
  • Get better quality sleep. It may not seem possible in our busy lives, but getting proper rest - not always more - but more sound sleep is key. At least the darkness of winter is a plus in this case.
  • Wash your face with cooler water. The heat may feel good, especially in the winter, but it does tend to have a desiccating effect. Not what we want for a more refreshed look.
  • Place cooled tea bags or fresh cucumber slices over your eyes. The tannins in the tea tighten the skin and the antioxidants in the cucumber cool and soothe tired eyes. It feels like a little trip to the spa, without too much effort!
  • Reduce your salt intake, get some fresh air and exercise. All things we know we should be doing but somehow, we forget. 
3. BANISH THE DARKNESS OF UNDER EYE CIRCLES!
While it sounds like a Lord of the Rings quote, dark circles are actually pretty easy to rid yourself of, if only temporarily. Much the same as the previous advice (sleep, good diet, exercise), if you can't manage that, makeup sure can! While using an under eye concealer will not necessarily make your eyes look bigger, covering dark circles will make them look brighter, so this step is still important. A little concealer on the lid can also help keep eyeshadow in place and give a smoother base to apply colour. Ensure you use a shade just slightly lighter than your foundation to illuminate without making it look too unnatural. 

4. HIGHLIGHT AND CONTOUR
 Stick with lighter, neutral colours. Matte shadows work well but a little shimmer is perfectly lovely, as long as it's light.  It's a good idea to follow the rules of contouring. Put light colours for the areas you want the light to reflect and darker shades for the areas you want to recede. Generally speaking the darker colours would be best in the crease and lighter colours on the arch and the centre of the eyelids will help bring those areas into focus.  Contouring the crease helps create the illusion of deeper set eyes, which in turn make them appear larger. Use matte shade in brown, green or purple (depending on your eye colour and your preference) from the outer corner to the crease and blend it well. You can go a little above the crease for a more dramatic look or to help add contour to a hooded lid. Adding a little shimmer in a light colour to the inner corner creates a little something extra to your eyes and helps you look more awake. 
Picture
5. PAY ATTENTION TO THE WATER LINE
If you "tight-line" the upper water line with dark shadow or pencil and apply white, nude or gold eyeliner to the lower water line, you will dramatically enlarge the eye area.  Lift your upper lid and apply a dark liner (I like to use either a pencil or a paste) to the line just below the lashes. It helps fill in the spaces between the lashes resulting in a fuller look, without false eyelashes. By applying a white, nude or gold liner to the bottom water line (the line between your lashes and your eyeball - be careful!), it brightens up your eye and makes your eyes look bigger.  Dark colours on the bottom lashline will make the eyes look smaller, so we don't recommend that if enlarging the look of your eyes is the goal

6. EASY DOES IT WITH THE EYELINER
When using liner on the lower lashline to make your eyes appear bigger, make sure to only apply it to the outer third. Opt for a softer shade (rather than black or dark brown) and smudge it softly. As for the top lid, draw a line as close as you can to your lashes. If you are feeling flirty, you can create a tiny flick and gradually make it thicker at the end to add a visual lift to the outer edge of your eyes. Remember to practice with softer shades until you get the hang of it. It's always easier to increase the drama rather than having to wipe it all off and start over. 

7. ADD MORE DRAMA WITH YOUR LASHES
Lashes really make all the difference. Nowadays with false lashes, lash extensions, volume boosting mascara formulas , lash curlers, lash tints and lash lifts​, it makes it a lot easier to really draw attention to your eyes and ramp up the wow factor. Start with a good thickening and lengthening  mascara in black or brown for your everyday routine. Curling your  with a lash curler before you apply mascara is also a good idea. For a more permanent (lasts a few weeks), tinting and  perming your lashes can have you waking up bright eyed and bushy tailed. If your schedule and budget permits, lash extensions are very popular. You barely need any make-up with those. And if you just want to play it up for a special occasion or photoshoot, strip lashes applied with a lash adhesive can really ramp up the drama and make your eyes look gorgeous! 

There you have it! 7 ways (and then some) to make your eyes look brighter and bigger with make-up. I use these tricks and techniques daily on my own hooded eyes as well as when I do make-up for brides and boudoir clients. They work!
1 Comment

5 Simple Hacks to Make Your Hair Routine Simpler and A Lot More Fun!

11/19/2019

0 Comments

 
Wouldn't it be great if we just woke up every morning with perfect hair? I know that's not my reality and I can bet it's not yours either. Whether your hair is short or long, curly or straight, coloured or natural,  I've got a few tricks up my sleeve to make your morning routine a little faster. 
Picture
1. GIRL, WASH YOUR HAIR. 
Now anyone who knows me, knows I actually only wash my hair like once (maybe twice) a week. My hair is naturally straight, naturally fine, and can be a little limp. Usually on wash day I wear it in its natural state - straight that is, but there's no way I'm settling for limp. So the stuff I use on wash day is really important to set me up for the rest of the week. For me it's all about the volume, so I use the Revive Shampoo and the Revitalize Conditioner from Monat. It pumps up the volume in my hair, but keeps it oh so soft and tangle-free. It helps with  static and flyaways and gives me a clean feeling without being stripped (especially important if you colour your hair like I do). Now, I know you don't all have hair like mine but trust me when I say, we do have a shampoo and conditioner for your specific hair type and its challenges. People often cheap out on their shampoo and conditioner but to me, those are your foundation products, they are going to set you up for success on the daily.
2. CHANGE IT UP.
I always say, "Nobody likes change like a hairdresser". No matter what your haircut looks like (even if it's a pixie), you should be able to get at least 4-5 different looks out of it. If you don't think so, come see me and I will show you! You may have to get out of your comfort zone a little, learn a few tricks, use some different products and techniques but I'm not kidding...your hair has awesome potential and you are wasting it! Stop being boring and try something different with your hair. Sometimes my best looks have come out of my crazy bedhead (it sure helps with volume too)!

3. LEARN TO USE PRODUCTS.
I know it can be overwhelming and I know you don't want your hair to feel icky, but hair products are just solutions in a bottle. Whatever your problem is, there is a product to fix it and make it a lot more fun! If your hair is short - try a taffy or paste. If your hair is fine or long - mousse it and root boost it! If your hair is curly - try a cream and/or a gel. If it's thick and unruly - then smoothing products will be your best friend! Picking the right products for your particular hair challenges and goals is one thing (and I can definitely help you with that) but knowing when and how and why to apply it is also important. When you book an appointment at The Cat's Meow Salon I will show you exactly how to use each product, how much you should put in and where and then help guide you through all your options for styling it from there! 

4. LEARN TO USE HOT TOOLS.
I could live (begrudgingly) without a hair dryer and I rarely use my flat iron (not really what I'm going for) but if someone took my curling iron away I would seriously cry. My formative years were the late 70's and 80's and I'm pretty sure by the time I was in grade 3, I was a whiz with the curling iron (thanks to my 2 older sisters). Nothing fixes my bedhead (check out my videos on Facebook) and gives my fine hair a lift (not to mention several more days without washing and endless styling options) than my beloved curling iron. I use a classic 1" Babyliss iron that I've had forever but if it ever quits, you can believe I will be rushing out to get another one. On that note, however, I do also love my blowdryer (BioIonic for the win) and do pull out my flatiron (one I received as a gift when I did hair for New  York Fashion Week, so it's special to me) to fix my straight hair once in awhile. Hot tools are like a hammer and a drill for a carpenter...it's pretty hard to build a good looking structure without them. And the more you use them, the better you get at it and the more fun it is to switch up your look. Not to mention, the products we use and recommend are all eco-friendly, non-toxic, cruelty-free and naturally based. You can feel really good about using them...especially once I show you how!

Picture
5. ACCESSORIZE! 
When in doubt use a scrunchie, a scarf, a clip, or some bobby pins to dress things up or mess things up! It doesn't have to be perfect! Even if your hair is short, a hairband or a barrette can add a really nice accent to your hair and give people an excuse to compliment your style! There are so many fashionable and inexpensive accessories on the market now...you just need to go for it! It adds a bit of colour, or texture to your style, plus it can be really helpful to get rid of a bunch of hair before you start styling it. I am well known for taking my bed head, pinning up half of it and then salvaging the rest of it with my curling iron. And if I'm feeling a little drab, I'll add a little sparkle!
0 Comments

Talkin' 'Bout A Revolution...A Healthy Hair, Skin, Body and Mind Revolution

9/17/2019

0 Comments

 
Picture
Nobody likes change like a hairstylist and I'm all for a worthwhile crusade but my doctor just informed me what I suppose I already knew. All this change and charging forward has pushed my mind and body in the wrong direction. 

I recently found out that my cholesterol levels were dangerously high and if I didn't make some major changes I would be at risk for a stroke. I was a wee bit surprised by this since I am within a normal-ish weight range, rarely stop moving, and eat pretty well (I've given up ice cream forever after all). I don't smoke and rarely drink, and I thought I was pretty healthy but somewhere my body has decided otherwise.

Between stress, lack of any real self care rituals for myself, and probably a bit of genetics thrown in, I had a wee wake up call. I'm not a worrier by nature (ask my kids and their hospital experiences with me) but my doctor was really concerned. And come to think of it my legs are always swollen, my body aches and I get wicked migraines (that I usually just force my way through). I thought it was just because I work so hard, sleep so little and stress too much. Ohhhhhhh...I get it now. 
So, I am making some New Year's Resolutions early this year. I am a big fan of to-do lists and so I have written myself a daily check lists of things I need to do for myself. I need to commit 100% to this. 100% is a breeze. 99% is a b*tch. 
Some of the things that I've put on my "Do These Things Daily Or You'll Have FREAKIN' STROKE List":

1. Quit eating processed, refined, sugary junk and the bad fat stuff too. I know my husband is a chef (and I'm a damn good cook too) but temptations are everywhere and sometimes when you are super busy (like always) or super lazy (read: tired) you grab the wrong stuff.  I think I eat pretty well until I am forced to write it down (see #5). Luckily I prefer real food over fake and thankfully I don't bake as much as I used to when we had the ice cream cafe. Kayden and I are working on this together (since he's had some health challenges this year too and is a vain teenager). I'm sure BJ and Tim will get also dragged along for the ride and it will do them some good as well. I was never much good about sticking with a  diet when it was about losing pounds, but not stroking out is a pretty good motivator. 

2. Exercise a little every damn day. Like 20 minutes of yoga or stretching or walking is all I need to squeeze in. Housecleaning is good too but not enough. I need to be intentional about moving my body and clearing my mind. Once you get going it always feels good but somehow  pinning photos of people doing yoga doesn't count. I am working on clearing a bit of space in my new downstairs office/craft room (which has required all kinds of physical activity but isn't quite ready yet), so hopefully having that dedicated space will help. Getting up from long stretches from the computer will also be helpful (my posture as I write this leaves something to be desired). 

3. Take 15 minutes before bed to unwind. This means no screens past 11pm or caffeine after 4pm. I am soooo guilty of staying up way too late on the computer or iPad (I will miss our late night sojourns Pinterest, Facebook and Instagram) but I seriously, I clearly need to get some decent sleep. I have literally (no word of a lie) only had one night of a full 8 hours of uninterrupted sleep in more than 20 years. That's how I get so much done, so I don't let it bother me but obviously waking up regularly with a migraine is not great. 

4. Take my vitamins and stuff. I take all my goodies sometimes but obviously I am not firing on all cylinders and if I don't want to be on serious medication for the rest of my short life, I need a boost. Vitamins - check. Immunocal - check. Migraine prevention meds at night - check. Who wants to wake up with a migraine or get sick and not be able to function? I don't have the kind of job with sick days  and I've got so much that I want to do, so I've always known I should take this stuff. It's gonna be back to the little Days of the Week pill boxes for this girl. 

5. Keep a diary. My homework: a Food Diary for the nutritionist at the hospital, a Headache Diary for my doctor, a Period Tracker (Welcome to  the beginnings of menopause! Seriously I was done with my uterus like, 15 years ago) a Gratitude Journal (I will need lots of pages for this since I know it is the secret to everything in life) and a Big Goals Journal (I am a goal-digger after all!). Writing it all down makes it more real (especially when it comes to putting junk in your body) and I'm afraid I was not a good patient when my doctor asked me when my last headache or period was (it seriously feels like every damn day). 

6. Take off my make-up, wash my face and apply skin cream faithfully. I hate to admit this but I am guilty of neglecting myself in this area too. Especially when we would cater until 2 in the morning or I was at the hospital with the boys till the wee hours of the night. It even grosses me out but I still did it. At the time of this post, I have not yet received my brand new skincare order from Monat yet (it's on it's way!!), but let me tell you, I have never been so excited to receive a package in my life. This past couple of years has really taken a toll on my face, and while I have been using good products (thank you Aveda!), I feel like a big shake up is in order (duh). I have been totally blown away by the haircare products (sorry, Aveda!) and have been using the Rejuveniqe Oil every day on some part of my body, with great results, so I can't wait to get the whole line. I have been really good about hair treatments at least because my hair feels so soft when I do it and I can goes more days without washing it now.   

7. Take time to dream big with business but stay grounded with family and friends. I've been joking in the the salon that Aveda is like a husband who I've been married to for 15 years, and Monat is like a new Latin lover who treats me right and buys me presents! (no need to apologize to my real husband of 21 years - he is still my partner in business and life and I am grateful for all that he is doing to get the boutique motel going!). We are busy though with all our ventures and while I am blessed with these new opportunities that are helping us recouping some of what we lost last year,  taking time out to nurture those relationships with family and friends is also a big priority for me. We're not getting any younger and we've already had to say goodbye to a few of our favourite people. We named our new little kitten Morley, after Tim's dad who passed away last summer, because that sweet little stray cat has brought lots of love and laughter back into our lives (the other two cats are less than impressed however, but there is enough love and food to go around, so they need to just get over it). 

The Hair Apparent Blog, and all my other business ventures, and of course marriage and parenting have always been about making others happy. With hair, aesthetics, food and ice cream and now the hotel plus my plans and dreams for my coaching
 and Monat business, my heart has always been in service to others and it always will be. I've just got to get my head around taking care of my body, mind and spirit so that can continue to give back to my community and my family for a long time.  That is my legacy and I'm not nearly finished with it yet. 
Picture
0 Comments

GET YOUR GLOW ON...IT'S THE PERFECT TIME FOR A SAFE SUNLESS SPRAY TAN!

9/3/2019

0 Comments

 
Picture
Now that summer break is officially over and the kids are back to school, it's time to discover the safe way to tan your skin. With late summer and fall weddings on the horizon, a spray tan can help you maintain your summer glow.
  • It can help blend away tan lines 
  • It can even out areas that haven't seen as much sun 
  • It can give you an overall  healthier appearance
  • It can be customized to your skin tone
  • It looks really natural!
  • It doesn't look orange or streaky
 If you're not ready now to try a spray tan...winter might be the best time for you! I always go on our winter vacation to Mexico darker than when I come home, because I have BJ give me one of her flawless airbrush tans, and then I hide in the shade for most of the trip! But at least I don't feel pasty the first time I put a bathing suit on in months!

WHAT TO KNOW BEFORE GETTING A SPRAY TAN:

Pre-grooming is important...

When preparing for a spray tan, it's important to prep your skin appropriately to get the most out of it. Ahead of you appointment, start by exfoliating your skin to remove dead skin cells by using small, circular motions, and avoid scrubbing too hard to you could damage the skin's delicate surface.  BJ's advice: Pay attention to your wrists, ankles, elbows and knees as those areas are prone to grabbing the colour. Make sure you exfoliate these areas first to help keep the colour even. We recommend Aveda's Beautifying Radiance Polish. Mineral-rich salt crystals comfortably polish away surface cells ready to leave, renewing your skin, while certified organic plant oils melt moisture in. 

BJ makes sure she applies less solution to these areas. 

It's also important to moisturize all over - leaving enough time for it to fully soak into the skin.

It's best to keep your shaving or waxing to at least 24 hours prior to your appointment. Just before you tan it's a good idea to take a cool shower and wash away deodorant, body lotion and freshen the skin from perspiration which can react with the tan and cause a slight yellow effect. 

Check the weather...

I know it sounds silly, but life favours the prepared! On the morning of your spray tan appointment, check the forecast. Take an umbrella even if there's only a slight chance of rain. If you get caught, we can walk you out to your car with one of the salon umbrellas! We don't recommend riding your bike or motorcycle after a spray tan.  A short walk is okay (just not in the rain!) but you don't want to get sweaty after your spray tan!
Picture
​What to wear to your spray tan appointment

During your appointment, we have a few different options. We provide disposable underwear, or you can wear your own, you can wear your bathing suit (black is recommended), but you will get tan lines. As professionals, we are perfectly comfortable (if you are) with no clothing at all.

When your spray tan is done, we recommend loose fitting clothing. A long loose dress with no tight elastic (and with no bra if possible) is perfect!

For shoes, during the service we provide sticky foot wear so that the bottom of your feet don't stain (we also apply a barrier cream to your hands and feet to keep them from getting too dark. For home, flip flops are the best...no socks and shoes!

OUR FULL BODY SPRAY TAN IS $55
​Leave bulky items at home...

Even if you're going straight from work to your appointment, best leave the bulky bags behind. You don't want to carry a heavy bag on your shoulder, only to come home and have a big old mark!

Always remember to take off all jewellery prior to your appointment. Not only do you not want marks to show after the appointment, you don't want to accidentally leave your best necklace or ring behind!
HOW TO MAKE YOUR SPRAY TAN LAST

Now that we've done the gorgeous spray tan and you've made it home safely, here are some tips to keep it for as long as possible.

Shower the right way...

For the first shower after your tan (24 hours after the initial bronzer is applied - the 'real tan takes about 12 hours to fully develop)', it's always best to use water that's not too hot. Avoid shower gels that leave residue behind on the skin (your first clue is that the product describes itself as 'deeply moisturizing'). The residue from the moisturizer can degrade the life of your tan. Simple, natural products are the best. We recommend Aveda's Beautifying Creme Cleansing Oil. It's a rich, oil-infused creme cleanser that gentle cleanses and softens skin without leaving a residue. Its uplifting aroma with certified organic rosemary, lavender, and bergamot is a real treat in the shower.

Pat, pat, pat...

After your first few showers following your spray tan appointment, rather than rubbing yourself dry, take your towel and softly pay yourself dry. This way, you won't rub away any of your tan and be left with a nice, even glow. 

Moisturizing is key...

In the days and weeks following your tan, it's best to keep your skin as hydrated as possible. We recommend Aveda's Beautifying Body Moisturizer. It's a nourishing plant blend of certified organic shea butter and olive, soy and safflower oils.

If you're an avid fitness enthusiast, after moisturizing, gently dust your body with baby powder. This will stop the fabrics from digging into the tan and causing patches to fade. 

I know that seems like a lot to remember, but BJ will guide you through each step. She has performed hundreds of spray tans: for photoshoots, weddings, fitness competitions, winter holidays, summer parties, etc. She has helped so many  women and men look and feel their best, in a safe, non-toxic way. Book your spray tan with BJ today!

A FEW OF OUR FAVOURITE THINGS...
0 Comments

We have fallen hard for Rejuveniqe Oil Intensive by Monat

7/9/2019

7 Comments

 
Picture
When we first brought the Monat haircare line into the salon, we had already been using a few of the products for several months on our own. We wanted to be sure it lived up to the hype and our standards. Well, I have to say, it has gone above and beyond!

Most of their products are infused with this magical elixir called Rejuveniqe Oil. I knew I loved the shampoo and conditioner I had been using - my hair has never felt so soft and manageable, with lots of volume even days after shampooing, and I had only heard good things about the Rejuveniqe Oil so I was eager to try it.

Turns out there are (at least) 101 uses for the oil and now I put that *bleep* on everything. 

Some background:
Rejuveniqe Oil Intensive is a light, non-greasy combination of rare oils that because of its unique molecular structure - mimics the body's own oils to absorb more deeply and moisturize more effectively. 

Knowing how to use Rejuveniqe Oil Intensive matters. In most cases, a few drops are all you need (really) but in other cases, more is better. Either way, you will see the benefits immediately by applying it to targeted areas on your hair, skin and scalp. With continued use the benefits keep improving! 

Here are just a few of the 101 uses for Rejuveniqe Oil Intensive (and it comes in a Light version too!)

HAIR

As a deep treatment. Apply all over hair and scalp. Wrap in a warm towel or old cotton t-shirt for 30 minutes, wash as usual. Some people go to bed with it in their hair. Because it is non-greasy it won't make a mess of your sheets, but covering your pillow with an old t-shirt can be a good safeguard. This works really well for fine or thinning hair as it helps to restore growth and repair split ends.

On dry hair Rejuveniqe Oil Intensive can be used to return shine (without harmful silicones), detangle and defrizz, protect the hair from heat damage, define curl, prevent flyaways and create a smoother, more polished look without being limp!

I even add a couple of drops to my colour formulas at the salon to create longer-lasting shinier colours!

SCALP
Help nourish and hydrate dry, flakey, itch irritated scalps by applying Rejuveniqe Oil Intensive directly to the scalp and massaging it in. It can help decrease damage and heal skin irritations. It actually helps keep the scalp from being too oily by balancing the natural oils. In many cases it can help stimulate hair growth by giving the hair a healthy environment to grow. It's even safe for people with severe scalp conditions and babies with cradle cap. 

FACE
Get extra hydration by blending a few drops into your moisturizer before applying. Or smooth and extend your foundation or mascara by adding a couple drops to your make-up. You can apply Rejuveniqe Oil Intensive directly to your skin morning and night. It helps to smooth the skin, increase elasticity, reduce puffiness and dark circles under your eyes. You can use it as a make-up or lipstick primer, smooth and tame your eyebrows, soothe cold sores and minimize the appearance of wrinkles and 
fine lines. Rejuveniqe Oil Intensive can also be used as a make-up remover and it even helps with acne by balancing the skin's natural oils. Men love it to moisturize their skin after shaving or to smooth the skin under their beard.

There are many other uses for Rejuveniqe Oil Intensive (like 101!) for the body, hands & feet, suncare, shaving, massage and make-up hacks and home remedies. Basically if you're skin, hair or scalp is out of balance, Rejuveniqe Oil Intensive can make it right again. That makes me really really happy and I could go on all day about all the ways I use and love this amazing magical elixir but don't take my word for it...try some for yourself! 

Visit sharonhuckle.mymonat.com and enrol as an VIP to get a 15% discount, free shipping, free products and access to the most amazing flash sales.
Picture
7 Comments

Simple 5-step Skin Care Routine

6/24/2019

3 Comments

 
Picture
You would think that washing your face is a simple task: water, soap, rinse. 
That’s it right? Well, I think I have a better way and it’s not actually that difficult once you know the routine and the right products to use. There are so many benefits to a good skin care routine, that it is so worth an extra few steps.

I’m sure you are taking steps to remove your makeup at the end of the day but what about your morning routine?  I’m here to help you with 5 easy steps to a clean fresh face that will be positively glowing. 

 1.    First things first, put that regular wash cloth back in the cupboard! For your face you want a microfibre cloth.  Your regular wash cloth is too rough for delicate facial skin.  A microfibre cloth has fibres that are finer than a hair and that allows the cloth to get into your pores to remove dirt and oil.  Microfibre is also very absorbent and it will pull out and soak up dirt and excess oil from your skin while reducing bacteria. Gently wash your face with your microfibre washcloth and water.  This will remove all of your makeup including mascara.  This will also clean out pores and even remove excess oil.  Don’t dry your face yet…

2.    Use a mild liquid cleanser to gently clean your face.  Your face ends with your décolleté, so don’t forget to go down your neck and chest with your cleanser (and toner and moisturizer). Apply with fingertips and gently massage your skin until your whole face has been cleansed.  One of my personal favourites is the Botanical Kinetics Creme Cleanser. I also love the AVEDA Exfoliating Cleanser (I have dryer skin and it loves the jojoba beads which gently exfoliate the skin while providing moisture). Use your cloth and gently wipe your face rinsing and repeating until you have removed all the cleanser.  Gently pat your face dry.

3.    Time for a toner!  A toner is a must have as it serves several purposes:  It reduces blemishes from oily or acne prone skin, minimizes pores by removing excess oil and contaminants from your skin.  A toner will also restore the natural pH level to your skin. It’s like giving your skin a cool drink of water, plus it feels amazing and can be used right over your make-up for a refreshing daytime pick-me-up. I keep my toner in the fridge with a spray nozzle for those hot summer days, a quick spritz and your skin feels fresh and revitalized.  I love the Aveda skin toners, they have two: Botanical Kinetics Skin Toning Mist for Normal to Oily skin and Skin Toning Agent for Normal to Dry Skin.  Allow your face and décolleté to air dry before the next step. 

4.    Now your face is clean and ready for eye cream, anti-aging serum or any other products that are part of your daily routine.  I would be happy to recommend the products that are right for your skin type, challenges and goals. We have highly targeted solutions for every face!


5.    Don’t forget to moisturize! I personally use and love the Aveda Tulasara Sleeping Masque! It isn’t really a masque but rather a wonderfully creamy moisturizer that is absorbed into the skin completely leaving your face feeling smooth and nourished).  I also use the Tulasara Eye Cream and Firming Serum.  These are my “don’t leave the house without them” products.  This step seals in the active ingredients in your creams and serums while it nourishes your skin.  If you don’t moisturize your skin will try to compensate by producing extra oil which can lead to enlarged pores and acne.  When you apply your moisturizer start at your décolleté and work up using gentle circular motions…never pull the product in a downward motion! We are trying to work against gravity here!
Now you are ready to face the day!  Remember to apply sunscreen.  I love the Aveda Daily Light Guard Sunscreen which has an SPF of 30 and can be mixed in with your foundation.  Applying a primer will prevent your makeup from soaking into your skin.  Apply makeup as usual.

At the end of your day repeat from step one.  Keep using these 5 steps every day to maintain your beautiful skin. Your skin will thank you!

~ Sharon

If you have any questions about the best way to care for your skin, just ask! I have been an esthetician for 20 years and I am always happy to show you how my skin has been transformed with the AVEDA products. The proof is written all over my 48 year old/young face!

book now
3 Comments

10 Tips for Gorgeous Summer Time Hair!

6/11/2019

10 Comments

 
Picture
What a glorious day! I hope you all got out to enjoy the nice weather!

Not to put a damper on things but now that the summer season is upon us, all that sunshine, heat and chlorine can sure do a number on your hair (and skin). We all know sunscreen is important and that weather can definitely affect our hair (hello humidity and frizz!)...so what's a girl to do?

Here are 10 really great summertime, haircare tips to help protect your hair from overexposure to the sun's harmful UV rays, dryness, breakage, frizz and general bad hair days! 

1. Wear a hat. Or a cute scarf wrapped around your hair. Protection and prevention is key here. And you can look really stylish while you save your hair. Have a little fun with your choices and save your hair at the same time!
2. If a hat or scarf is not your thing, spray on a hair sunscreen with UV filters before you go outside, especially if you are out working in the garden or hitting the beach. Longer exposure times for your hair take a toll, just as they do for your skin. We recommend AVEDA's Protective Sun Veil which is a water-resistant UV defense mist. It's easy to use (just spray it on!) and small enough to throw into your beach bag so you're always prepared! AVEDA's  Sun Care line which also includes a hair and body cleanser to wash away chlorine and product build-up and after-sun masque to treat your hair after all day exposure to the sun. 
3. Washing your hair with a clarifying shampoo is important for a number of reasons. Clarifying shampoos are especially important in the summer when we tend to be in chlorinated water and we perspire more. They are also very effective at removing product build-up (oh, those lazy days of summer) and also hard water/mineral deposits on the hair. It just gives a nice clean slate and we recommend it after hanging out in chlorinated pools or hot tubs or the lake. It's not a bad idea to use it every 4-5 washes as part of your regular shampoo routine, since we live in an area with pretty hard water.  One of our absolute favourites is the Clarifying Shampoo from Monat. It is effective at gently removing chlorine, hard water and product build-up but is completely safe for colour-treated hair. 
4. Use a deep conditioning masque. Deep conditioning masques are one of my favorite things to suggest to people because they provide instant gratification and long term results. One super trick is to put it on BEFORE you go into the sun or pool or lake to help protect your strands from damage. Put it in your beach bag and apply it while you are sitting in the sun. Let the heat from the sun act as a healthy hair treatment instead of damaging your hair. Alternatively, you could wait until your home, and use after your clarifying shampoo. For extra hydration, you can even sleep with a deep conditioning masque in your hair and rinse it out in the morning. We have so many amazing masques from Aveda and Monat for every hair type and texture and issue at The Cat's Meow Salon, available for you to take home or try as an intensive treatment in the salon.  Book an appointment for that​ ​HERE.
5. Avoid brushing your hair when it is really wet. When it is still wet your hair is already stretched and pulling it on it while it's in this fragile state can lead to breakage and split ends. Towel dry it gently by squeezing out the extra moisture (rather than rubbing it. Using an old t-shirt to dry it or wrap it in is even better than a terry towel. Apply a leave-in conditioner/detangler (try the Junior Detangler from Monat...it's not just for kids!) then comb gently with a Wet Brush or a wide tooth comb working in small sections from the ends up! Split ends can be helped with Monat's Rejuvabeads or Aveda's Damage Remedy split end repair. These products work wonders but the best thing to prevent split ends is gentle styling and regular trims. 
Picture
6. Avoid excessive heat styling. Use an air dry cream and let your hair dry naturally. We recommend Monat's Air Dry Cream. It works great if you braid your hair, or twist it into ringlets then shake it out when it's dry for a beachy textured look. If you must use heat, make sure your tools are turned down to low settings and use a heat protectant like Aveda's Damage Control or Monat's Blow Out Cream or Thermal Protect Styling Shield. You hair is like a fabric - you wouldn't iron your silk blouse on the denim setting  or you'd end up with holes in your blouse. Same goes for your hair!
7. Use Gel AND Curl Cream together to  lock in curls and repel the frizz. The two of these together work like magic to create really soft, bouncy curls without the frizz. Technique is also important! Making sure you are putting them on when your hair is still quite wet (fresh out of the shower!), mix the two products together in your hair, then apply in a praying hands motion (rather than raking it through) then SCRUNCH! You want to fully saturate the hair with product to help clump your curls. Put the product in and then let it dry naturally (no touching!) or with a diffuser on low heat. Our number one cocktail is AVEDA's Confixor liquid gel with AVEDA Be Curly Curl Enhancer. Sharon will be happy to teach you how to make the most of your curls (and banish the frizz!) at your next appointment!
8. If your hair is medium to long, pull it back gently using Invisibobbles, scrunchies, hair bands, or scarves. Alternate how you wear it, not just for fun with all the amazing hair accessories that are available now, but to save stressing your hair out in the same place all of the time. Try a low chignon, a high messy bun, a loose ponytail or a soft braid. The possibilities are endless. Check out my Everyday Hair Pinterest board for tons of inspiration! 
9. Extend the time between washing your hair, saving you time and energy, by using a dry shampoo and getting creative with how you style your hair (see # 8). We absolutely love Monat's The Champ Conditioning Dry Shampoo for its weightless texture and its ease of use. It smells amazing (that's important) and is wonderfully effective at absorbing excess oil and perspiration without leaving buildup. Sharon is addicted...ask her how many days she can go with out washing her hair and it still looks, feels and smells great!) As always, our recommended products are cruelty free and have no toxic ingredients! 
10. Schedule an appointment with Sharon for an AVEDA colour gloss that adds tons of shine, brightens your sun-faded color and nourishes the hair. It is essentially damage-free colour! And if all else fails, sometimes you just got to come in for a trim or chop it all off! And to help you achieve your best summer hair ever, when you book a colour and cut through our new online booking system you receive an in-salon deep conditioning masque treatment for FREE (see # 4)! How awesome is that? 

Now that you are equipped with the right tools, products and techniques it's time to get out there and enjoy the sunshine! Hope to see you soon in the salon. We promise to make you look and feel like the cat's meow! 
10 Comments

How to choose the salon and spa that's right for you.

6/2/2019

7 Comments

 
Picture
So, you're in the market for a new salon and spa. Where do you start?

If you've ever chased someone down in the grocery store who has a nice hairstyle, to ask where who they trust with their hair, good for you! Every one loves a compliment and sometimes asking around will give you a great starting point to help you find a new stylist or spa technician. Once you've received some recommendations (we hope The Cat's Meow Salon and Spa was one!), now is the time to do some online research! These days, between websites and social media platforms you should be able to get a pretty good idea about whether a salon and spa feels like a good fit for you.

Poke around our website (and others) to see if you like what you see.  Check out the service menu. Do we offer the services you are interested in, within your budget? Sometimes paying a little more to get good value for your money can be the best decision. The bitterness of poor quality lingers longer than the sweetness of a good deal. 

Does your stylist and spa therapist have experience and advanced education? We do! Sharon and BJ have more than twenty years experience in the beauty biz and have advanced training in each and every service we offer. We are always learning and perfecting our craft.

Does the salon share your values for using environmentally friendly products that aren't tested on animals? We use Monat haircare products and Aveda haircare, skin care, hair colour and make-up. Our products are certified cruelty-free and do not contain any parabens, silicones, artificial preservatives, harmful chemicals, colours or fragrances. 

Is it a convenient location with free parking? The Cat's Meow Salon and Spa is located in beautiful Downtown Belleville and we have plenty of free parking directly behind our building.  We are a short walk to lots of wonderful locally and  independently owned shops and restaurants, so make some time in your day to visit those too!

Check out our social media platforms (Facebook, Instagram, YouTube) and read some of our blog posts (like this one!)
Do you like what you see in terms of the body of work? Do you get a sense that we love what we do and that we are skilled in our profession? We hope so! We put a lot of time and effort into our daily work but also in trying to showcase our work and educate our guests (and potential guests) with helpful tips and tricks to make your beauty routine a little easier! 

If you are in the neighbourhood, pop in and get a general feel for the salon. Did you get a warm welcome? You will at The Cat's Meow Salon and Spa! Is it clean and inviting? We pride ourselves on our comfy, cozy and clean space. We insist on  safe  hygiene practices for all our salon and spa services. From the aroma therapy of Aveda and Monat's natural  products, we promise the most comforting experience. At The Cat's Meow Salon and Spa, we offer a beverage menu with specialty teas, coffee, hot chocolate, iced tea, lemonade and filtered water. Every hair wash comes with a head and neck massage and hand massage. Men receive a second shampoo and hot towel treatment at the end of their haircut. We offer complimentary make up touch-ups at the end of your service. We have blankets, heating pads,  aromatherapy all for your comfort. We offer a wonderful selection of magazines and books to read, iPads you can use to find hair and make-up inspiration, great music to listen to and always entertaining conversation to enjoy! BJ's green thumb means there are beautiful healthy plants providing extra oxygen! 

Pick up one of our printed service menus and consider booking your appointments online. We have an app for that! Download the VAGARO app on your smart phone or go to our website to book online (even if it's at 3 am). We stay on the cutting edge of technology to better serve you! We are open late (until 8pm) three nights a week and from 9am to 3pm on Saturdays. 

We recommend booking a complimentary 15 minute consultation and a salon and spa tour. While we may not have time when you first pop in we are always happy to book some time with you to show you who we are and see how we can help you achieve your beauty goals. During the consultation, you should expect nothing less than professionalism and good communication. Bring photos of hair that inspires you and be open to our expert suggestions based on your hair, face shape, skin tone, eye colour, lifestyle and budget.  Ask questions, answer questions, talk and listen and we will do the same. A clear plan with a price quote should be part of the consultation. Sharon and BJ will walk you through all the steps of your requested service and give you a plan for the future, including maintenance and home care. 

We hope this has given you some food for thought about whether or not The Cat's Meow Salon and Spa is right for you! We look forward to your visit!


7 Comments

The Power of Transformation and Collaboration

5/28/2019

1 Comment

 
Picture
Picture
I have been blessed to work with many other talented beauty professionals over the years, but one of my all time favourites in terms of helping women see the best in themselves has to be Jenna Faye Photography. I glam them up with hair and make-up and then Jenna Faye captures these gorgeous women in their absolute best light. When they first come into the salon (or we shoot on location), these women are always a mix of nerves and excitement, often exclaiming that they have never done anything like this and that they are way out of their comfort zone. After some thorough consultation, discussing their goals for the shoot, looking at photos of hair and make-up they like, going over outfit choices and pose options, we start to see the women relax and come out of their shell. We share stories and words of encouragement and giggle quite a bit. Then off they go to spend their time with Jenna and that's when the magic really happens. Jenna coaxes and coaches and when the photos come back (barely retouched), we cannot believe what has been revealed. Those shy, nervous girls (all ages, all body types, all confidence levels) have completely unleashed their more complex, softer, fiercer, more beautiful sides. Sometimes I can barely see their former selves and have to look hard to recognize them. I have been known to have to lay the iPad down and walk around it to see (especially if Jenna has gotten them into some upside down poses). One guest, who had hit a milestone birthday and was making a calendar for her husband was showing me the photos she chose and the ones she didn't and to one in particular I asked, "Why didn't you choose this one? It's gorgeous!" To which she replied, "my face looked awkward in that one". I laughed and said, "Oh my goodness, I did your hair and makeup and I didn't even look at your face! If I didn't notice (the narcissist in me should have), I don't think your husband will either!" 

I do believe that every woman should do a glamour or boudoir shoot: you will feel so good about yourself! Of course,  I highly recommend Jenna Faye Photography. Many of the shots you see throughout our website can be credited to her. She is one of the most highly skilled, relaxed, organized and professional photographers I have ever worked with. All of her photography work with family, babies, corporate branding, glamour and boudoir, is absolutely breathtaking. Be sure to check out her website: jennafayephotography.com and her facebook and instagram pages. And book...you won't regret it!  
1 Comment
<<Previous
    Picture

    Author

    Hi, It's me...Sharon. A real life, honest-to-goodness serial entrepreneur who loves friendly people, pretty hair and make-up, cooking and eating good food and travelling and/or hanging out with my family. Those who know me, know I am constantly working on some project or another. Those who love me, know that, in a heartbeat, I would put down said project to be there for them 100%. 

    Archives

    January 2021
    January 2020
    November 2019
    September 2019
    July 2019
    June 2019
    May 2019

    Categories

    All

    RSS Feed

      Picture

      Hey there gorgeous!
       
      It's Sharon here coming at you live and in person from The Cat's Meow newsletter. I've got a lot of tricks up my sleeves accumulated from more than 20 years in the beauty biz. I'd love to be able to share them with you via email! 

      Once a month I send really useful information about all kinds of things: educational articles, blog posts, tutorials, videos, FAQs, promotions and flash sale offers...so much good stuff you wouldn't want to miss! 

      Plus I love to treat our loyal subscribers to fun freebies and awesome contests! Enter your email below so I can spoil you with all the goodness! 

    Subscribe
Powered by Create your own unique website with customizable templates.